При контроле качества текстильных изделий, материалов автомобильного интерьера и кожаных изделий устойчивость к истиранию является одним из ключевых показателей для оценки эксплуатационных характеристик и долговечности продукции. Прибор Schopper Abrasion Tester, как международно признанное устройство для испытаний на вращательное истирание, широко используется в контроле качества и разработке продукции в текстильной, автомобильной и кожевенной промышленности благодаря точному принципу испытаний и стабильной повторяемости результатов.
Ⅰ. Обзор прибора
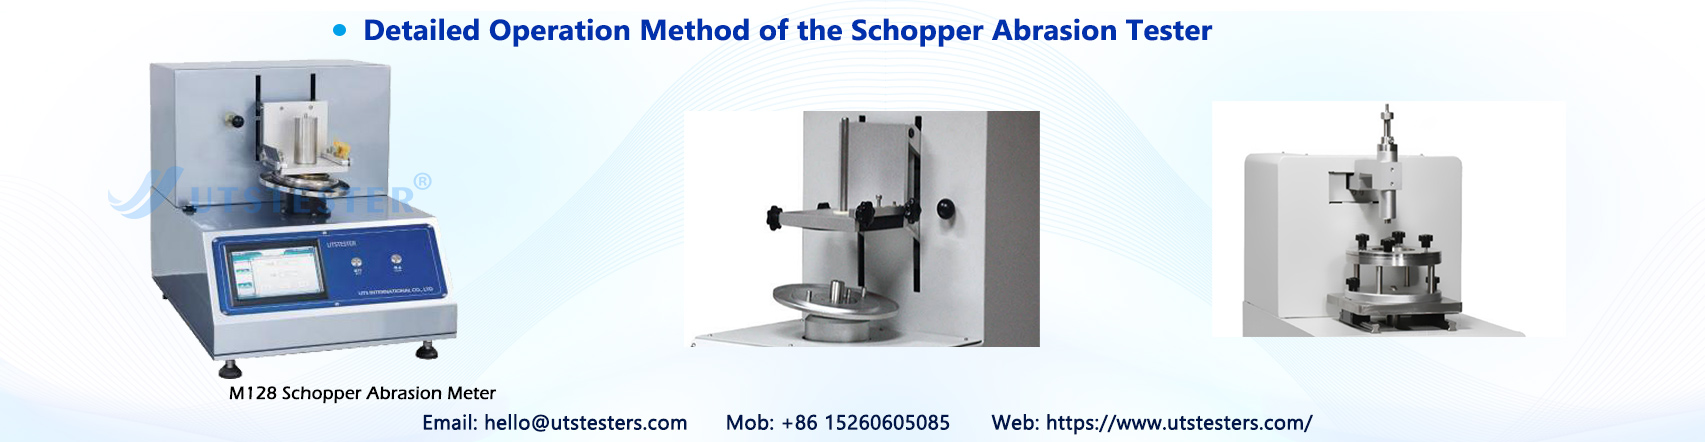
Прибор Schopper Abrasion Tester использует метод испытания на вращательное изнашивание, при котором трение к вращающемуся образцу прикладывается по касательной через элемент трения, имитируя многоплановые условия истирания при реальной эксплуатации. Он оценивает изменения внешнего вида образца, потерю материала и образование отверстий после трения. Прибор компактный и прочный, оснащён системой управления с ПЛК и сенсорным экраном, поддерживает ручной и автоматический режимы управления, прост в эксплуатации и обеспечивает высокую повторяемость результатов.
Ⅱ. Применяемые стандарты
- DIN 53863 Часть 2 "Испытание поверхности текстиля на истирание (испытание на вращательное истирание)"
- Стандарт GME 60345
- Стандарт GMW 3283
- Центральный стандарт VW/Audi PV 3908
- QC/T 216-1996 (стандарт, относящийся к автомобильной промышленности)
Ⅲ. Принцип работы
Основной принцип работы прибора Schopper Abrasion Tester заключается в следующем:
1. Установка образца: закрепите круглый образец (примерно 100 cm²) на вращающейся испытательной головке, зажимаемой тупоугольным коническим патроном (угол конуса 166°). Кронштейн испытательной головки наклонён на 7° для обеспечения площади испытания 50 cm².
2. Процесс трения: двигатель приводит образец во вращение со скоростью 75 об/мин. Фрикционный материал (обычно наждачная бумага) остаётся в линейном контакте с образцом, создавая трение в тангенциальном направлении.
3. Переключение направления: каждые 100 циклов трения (регулируется) прибор автоматически останавливается и переключает направление вращения (по/против часовой стрелки), имитируя многоплановое трение при реальной эксплуатации.
4. Оценка результатов: после испытания образец проверяют на потерю материала, образование отверстий или износ поверхности для количественной оценки устойчивости к истиранию.
IV. Подготовка перед испытанием
1. Подготовка окружающей среды
- Установите прибор на устойчивый лабораторный стол без вибраций и убедитесь в отсутствии сильных электромагнитных помех поблизости.
- Рекомендуемая температура в лаборатории составляет 20±2°C, относительная влажность — 65±5%.
2. Подготовка образцов
- Вырежьте круглые образцы площадью примерно 100 cm² в соответствии с соответствующими стандартами.
- Образцы должны пройти кондиционирование по температуре и влажности: выдержите их в стандартных атмосферных условиях не менее 24 часов, чтобы исключить влияние внешней среды на результаты испытаний.
- Проверьте поверхность образца на наличие явных дефектов, складок или загрязнений, которые могут повлиять на точность испытания.
3. Проверка принадлежностей
- Убедитесь, что все принадлежности, включая крепления, грузы (50 g–1500 g), наждачную бумагу и прибор для измерения высоты дуги, присутствуют.
- Проверьте, что наждачная бумага ровная и не повреждена; при необходимости замените её новой.
V. Подробная процедура работы
Шаг 1: Установка испытательного образца
1. С помощью кольцевого ключа и принадлежностей, поставляемых с прибором, установите кондиционированный по температуре и влажности образец на зажим образца, формируя вращающуюся испытательную головку.
2. Используйте устройство измерения высоты прогиба, чтобы отрегулировать высоту выступа испытательной головки. Согласно требованиям стандарта, высота прогиба обычно устанавливается в диапазоне 5–8 mm. Точность высоты прогиба напрямую влияет на натяжение образца, что, в свою очередь, влияет на результаты испытаний.
Шаг 2: Установка испытательной головки
1. Поместите испытательную головку с установленным образцом на монтажную плиту испытательной системы на рабочем столе прибора’я.
2. Совместите установочные штифты монтажной плиты с установочными отверстиями под испытательной головкой, затем установите и закрепите её, чтобы исключить люфт испытательной головки.
Шаг 3: Установка фрикционного материала (наждачной бумаги)
1. Используйте зажим фрикционного материала на прижимной пластине, чтобы закрепить наждачную бумагу на нижней стороне прижимной пластины.
2. Затяните зажим, чтобы обеспечить надежное закрепление шлифовальной бумаги и её ровную установку, без морщин или воздушных пузырей.
Шаг 4: Применение давления
1. Вручную потяните подъемный рычаг с правой стороны прижимной пластины наружу, чтобы опустить прижимную пластину и привести шлифовальную бумагу в контакт с поверхностью образца на испытательной головке.
2. В зависимости от образца’массы на единицу площади, установите соответствующий груз на ось груза над прижимной пластиной:
- Масса на единицу площади ≤100 г/м²: Примените 1,0 Н
- 100–150 г/м²: Примените 2,0 Н
- 150–300 г/м²: Примените 5,0 Н
- >300 г/м²: Примените 10,0 Н
Прибор стандартно комплектуется грузами 50 г, 100 г, 250 г, 500 г, 1000 г и 1500 г; разные значения давления можно получить их комбинацией.
Шаг 5: Установка параметров испытания
1. Включите питание прибора’для доступа к сенсорному интерфейсу.
2. Установите общее количество оборотов (в соответствии с требованиями стандарта, например 500 или 1000).
3. Установите количество оборотов в одном направлении (обычно 100, что означает автоматическую смену направления каждые 100 оборотов).
4. Выберите режим управления: Автоматический режим (рекомендуется) или Ручной режим.
Шаг 6: Начало испытания
1. После проверки правильности всех параметров нажмите кнопку Пуск.
2. Прибор начинает работу, и образец подвергается вращательному трению с шлифовальной бумагой.
3. После достижения установленного числа оборотов в одном направлении прибор автоматически останавливается, меняет направление и продолжает работу.
Шаг 7: Окончание испытания и снятие образца
1. После достижения общего числа оборотов прибор автоматически останавливается.
2. Поднимите прижимную пластину и снимите испытательную головку.
3. Разберите крепеж и аккуратно извлеките образец, стараясь не касаться изношенных участков.
4. Проведите визуальный осмотр, взвесьте образец (точность: 0,1 мг) или проанализируйте наличие отверстий. Сравните результаты с исходным образцом для оценки его износостойкости.
VI. Таблица справочного выбора давления
Выбор соответствующего давления вниз в зависимости от массы образца является ключевым для обеспечения точных результатов испытания:’
|
Масса образца на единицу площади
|
Рекомендуемое давление
|
|
≤100 г/м²
|
1,0 Н
|
|
100–150 г/м²
|
2,0 Н
|
|
150–300 г/м²
|
5,0 Н
|
|
>300 г/м²
|
10,0 Н
|
> Примечание: Конкретные значения давления должны определяться в соответствии с применимым стандартом испытания, так как значения могут различаться в разных стандартах.
VII. Эксплуатационные меры предосторожности
1. Регулировка высоты дуги: Высота дуги образца должна строго соответствовать стандарту. Если она слишком высокая или слишком низкая, это вызовет неравномерное натяжение образца и повлияет на результаты трения.
2. Замена шлифовальной бумаги: Во время испытаний шлифовальная бумага постепенно изнашивается. Рекомендуется заменять её на новую после определенного количества испытаний или в соответствии с требованиями стандарта.
3. Загрузка грузов: при установке грузов убедитесь, что они надежно закреплены, чтобы предотвратить их падение во время испытания; своевременно снимайте грузы после испытания, чтобы снизить длительную нагрузку на систему рычага.
4. Переключение направления: при использовании ручного режима обязательно своевременно переключайте направление вращения после того, как прибор подаст соответствующую команду, чтобы избежать чрезмерного износа в одном направлении.
5. Меры безопасности: не открывайте защитную крышку и не прикасайтесь к движущимся частям во время испытания, чтобы обеспечить безопасность оператора.
Информация в этом документе основана на таких стандартах, как DIN 53863 Part 2 и GMW 3283. Для конкретных процедур эксплуатации см. руководство по эксплуатации прибора’руководство пользователя и последнюю версию стандарта.
Эл. почта: hello@utstesters.com
Прямой: + 86 152 6060 5085
Тел.: +86-596-7686689
Веб: www.utstesters.com


 +86 152 6060 5085
 English
 русский
 español
 português
 العربية
 Polski


 hello@utstesters.com
 hello@utstesters.com
 +86 152 6060 5085
 +8615260605085